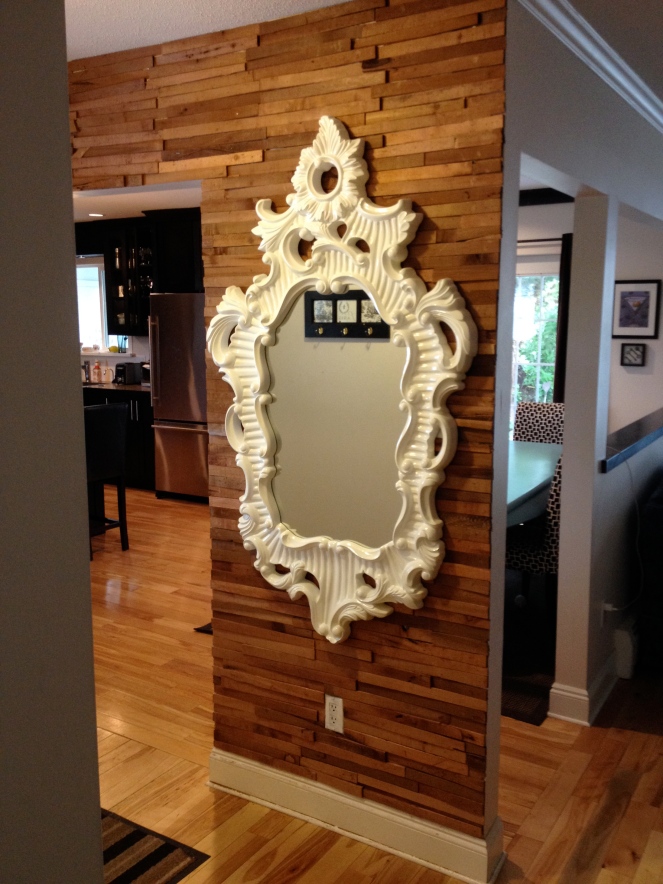
 Tired of the trees, (see before picture below ) I thought I’d try something new.
  So, I purchased 4 packages of cedar shims from the Home Depot – $7.00 each and started nailing! I had no idea how this would look finished, but I also knew I could tear them all down if I hated it. There is mostly only one nail per shim, and I can putty those holes up easily.
Starting in the corner I worked my way across the wall and down, alternating the direction of the shims as I went. I liked the flawed ones the best and tried to use them as much as possible, sometimes having to overlap them onto one another. Half way down I got very comfortable and was adding pieces willy nilly, having the best time solving the puzzle I called my front entry.
beautifully flawed
When I was done, I first marvelled that I came away with only a small blood blister on my thumb from when I had an argument with the hammer. I debated painting random shims in coordinating colours from around the house like black, white, chartreuse, yellow or turquoise, but I just couldn’t decide. This is the last area you are in before you leave the house so a mirror is appropriate, both colours and mirror may have felt too busy. But knowing me, I never say never…..
 And what a mirror I found! If you ever needed an example of eclectic , this would be it.
I realize this look will not be for everyone, but if you DO like it, it was fun and easy to do, the investment was minimal and easy to change back if you just can’t live with it. There are also large flat cedar shims available that would make a great larger feature wall or headboard. Speaking of headboards, or the fact that I’ve put that project off long enough, it’s the next on my list. Promise.


I would never have thought that was shims! I’ll have to keep those in mind. They make a beautiful statement.
And cheap! Don’t forget cheap! 😉